April 23rd, 2021
How Can We Help?
Let’s talk about the WordPress structure.
IMPORTANT NOTE ABOUT YOUR THEME & TEMPLATES
 All WP websites are designed through the use of “themes” which are a combination of templates, graphics and stylesheets controlling the look and feel of your POSTS, PAGES & CUSTOM POST TYPES. All Small Details websites are either considered custom (or highly customized) and you’ll find the theme listed in the Appearance section of the “Dashboard.”
Since your “theme” controls the functionality of the website, we ask that you not alter these templates or stylesheets unless you’re familiar with PHP and CSS (the code used to develop these documents). If it becomes necessary to change a template structurally, please get in touch with us to discuss. (Thank you!)
That said, a good starting point is to familiarize yourself with the WordPress layout. Once you’ve logged in you’ll be presented with the “Dashboard,” a landing page that will display (in most cases) a “Welcome Panel” with shortcut links (some helpful, others a little tricky), your Google Analytics Summary, more about WordPress, “site health” and in some cases “Elementor.”
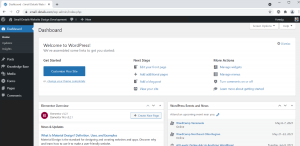
Of course, your Dashboard may look slightly different depending on the features we’ve installed but next, take a look at the left column (black area) of the Dashboard screen. This is the “menu” for just about ALL of the features you’ll be using to maintain your website. Many of these menu items expand to the right (on-mouseover). Some will drop down below the main item/topic (on-click). You’ll note some also offer “Manage” or “Add New” options you’ll be using on a regular basis.
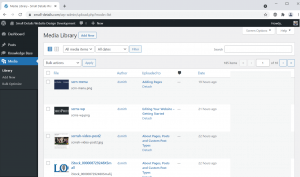
Next, we’ll look at the “Media” link in the Dashboard menu, and the “Media Library” itself. The Media Library is made up of all photos/images, documents, video and/or audio files uploaded to your website through the “Add New” button in the Library or by clicking on the “Add Media” button in the “Text Editor.” There are 2 viewing options for the library: List (detail) mode or Grid (visual) mode. See Detail mode right – click for enlargement.
In this Library you’ll find an alphabetical list of files along with their thumbnail images, linked file names, author, the page(s) associated with that particular file plus a VERY HELPFUL SEARCH tool to locate the file “path” or properties, which you’ll be doing on occasion. Click on the linked file name and you’ll see information on the right side of the screen under “Save.”
Now let’s put it to use! We’ll be referring to the Media Library and available media tools throughout this documentation.
EDITING TIPS
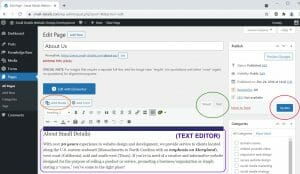
There are a handful of tasks you’ll perform routinely that may feel a little “glitchy” from time to time. These include adding images, linking text and adding PDF’s.
The following tips ‘n tricks will make life easier:
- Again, WE RECOMMEND the use of Admin Notepad OR another editing tool on your computer (possibly Microsoft’s Notepad software) that can be used to strip formatting out of text collected from Word documents or other websites. This can cut down on frustration… especially when you’re dealing with bullet lists.
Click above OR do a quick search on your computer to locate Notepad. With the computer software, you can right click and create a desktop “shortcut” for easier access. - To create a NEW LINE or NEW PARAGRAPH… IT SOMETIMES HELPS to use your “Shift” Key and “Enter” keys at the same time. Generally the Enter key alone is fine but if you run into problems use Shift & Enter simultaneously.
- To REPLACE text using COPY/PASTE – Especially headlines/titles, and subtitles, ALWAYS START by putting your cursor between the first and second letter of the first word you’re replacing, pull left-to-right (highlighting all text to be replaced), right click and paste your new text. Then go back and backspace to delete that “leftover” first letter. *** If you forget and do otherwise, you can always click the “Undo” arrow above the text editor as long as you didn’t use the “Update” button immediately afterwards.
This may sound like more work but it will become second nature and save you TONS of time in the long run. Next, let’s get on with the business of editing your content!