April 24th, 2021
How Can We Help?
Focus: This article is designed for Website Administrators.

First, Important Notes About Slider Images
If your existing slider consists of horizontal (wide) images/photos, chances are a vertical (long) photo will not be a good choice. By default, most sliders will resize photos to fit the dimensions set up when the plugin was installed. Changing these settings may distort the existing slides in your slideshow so if you wish to change the entire set-up please get in touch BEFORE taking any steps in this direction.
ALSO, to make sure your slideshow doesn’t get bogged down, try to keep your photos no wider than 2000 pixels (about 16″). Typically a photo should be no more than 2MB but you should be able to stretch that to 3MB. Just keep in mind that large photos take longer to load on the screen.
The flip side of this is that cropped or small photos will be STRETCHED to fill up the designated space for the slideshow. That means for full-screen slideshows, anything under 400-500 pixels (roughly 5″) is not recommended. For smaller slideshows you can always try it and if it looks bad, remove it.
Slider Plugin Selection

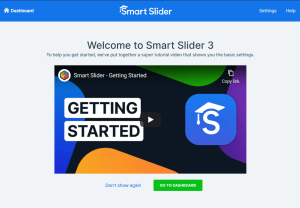
Our preference for homepage (and other) sliders has shifted several times over the years. There are a few plugins we revert back to on occasion (one listed below), and another we’ve recently been working with that safely rates above all others for it’s brilliant interface, animations, special effects, and fast-loading results: Smart Slider
Working With SmartSlider
Although there is a learning curve, the plugin developers provide a great selection of helpful documents and videos designed to get you up and running.
Rather than reinventing the wheel, we’d like to provide a link to their website where they cover:
- Getting Started – Installation & Update, Activation & Licensing, Publishing, Tutorials
- Configuration – Interface, Slider Settings, Layer Options, Dynamic Slides, Layer Animations & Events, Global Settings… and more
- Troubleshooting – Admin Area, Frontend, Server errors, Browsers, Functionality
Please get in touch if you’re interested in having us install and integrate the SmartSlider set of tools on YOUR website!
Side note: They also have a Carousel option, which we haven’t tried yet. We will absolutely post it to our Carousel article once we’ve got details.
ADDITIONAL SLIDER PLUGIN OPTIONS:
Meta Slider
Meta Slider slideshow may also be a good fit for you. Once Meta Slider has been installed and set-up for your site you can add to it, edit or replace slides and captions.
1) Click on “Meta Slider” link in the left side Dashboard column. You’ll see existing images in the order in which they appear on the website.
- a) To ADD a NEW SLIDE click the “Add Slide” button in the top/middle area of the screen. Either select an existing image/photo from the Media Library or click the “Upload Files” tab then the “Add to Slider” button in the lower right corner of the screen.
The new image will now appear in the list. To move it to a different spot in the order simply drag and drop to the desired location.
If your images use a caption (you’ll see captions listed) add one for your new slide. If not you’re finished. Either way, be sure to “Save” (upper right corner) or “Save & Preview.”
If you wish to LINK your slide to a specific page on your site or another site minimize the WordPress screen, OPEN A NEW BROWSER WINDOW (right click on your browser of choice – Google Chrome, Internet Explorer, Safari, etc), find the full “URL” (address of the page you wish to link to), right click and COPY. Next maximize your WordPress screen, locate the “URL” field associated with your photo, place your mouse in the URL field, right click and PASTE the URL. If you’ve captured the full address you’ll see “https://” in the beginning. IF YOU DON’T SEE “https..” go back and try again. An incomplete link will not work.
ALWAYS be sure to “Save” or “Save & Preview”!
b) To REMOVE A SLIDE simply hover over it to see the red “x” box. Click that box and it will remove it from the list. (SAVE!)
2) PLEASE don’t edit the settings on the right side of the screen without speaking with Small Details FIRST.
There are different slideshow “themes” but chances are your stylesheet has been personalized to match the appropriate theme we originally selected. NOTE: Some themes don’t work well with certain layouts.
3) Always minimize your WordPress screen and check your work in a new browser window (SEE INSTRUCTIONS ABOVE). That way you can make any needed adjustments while you’re still logged in.
